1. Overview
Spaces is the simplest way to organize your notes and notebooks about a specific topic into a centralized, easily accessible, single source of truth.
By creating a new space for each project, topic, or workgroup, you can:
- Quickly view, share, and edit a collection of related notes and notebooks in one place.
- Highlight important notes by pinning them for quick reference and easy access.
If you’re wondering about the differences between Spaces, Stacks, and Notebooks, you can check out this article to learn more about them and how to use each one.
Spaces for individuals is a beta feature, and improvements are coming in future releases. Please suggest/upvote improvements at this link.
Ways to use spaces
How you decide to organize your spaces depends on how you work and what you want to achieve.
EXAMPLES:
-
Managing clients and vendors
GOAL: Keep track of customer and partner accounts and make it easy for everyone on the team to quickly capture, save, and find what they need.
HIGHLIGHTS:
- One space for each group of clients or vendors, categorized by geography, owner, or type.
- Separate notebooks for each client or vendor account with relevant meeting notes, ideas clipped from the web, or PDF proposals.
- Use What's New to track recent client and vendor activity or meetings.
- Use Pinned Notes for quick access to key client or vendor accounts, or those which require immediate attention.
-
Managing projects
GOAL: Keep track of project info, tasks, and timelines; and make it easy for everyone on the team to quickly capture, save, and find what they need.
HIGHLIGHTS:
- One space for each project.
- Separate notebooks for different types of info, such as meeting notes, ideas, design specs, or marketing materials.
- View What's New to track recently updated project timelines or task lists.
- Use Pinned Notes for quick access to a project overview, milestone, or messaging notes.
-
Other use cases: personal life, school
-
- Apart from work, Spaces are great for organising your personal life. Easily track recipes, grocery lists, and home tasks, while also planning and managing your personal projects. For trips, you can organise details and collaborate with others.
-
Spaces are also great for university courses, whether you're a professor looking to create a database of lecture notes and exercises, or a student wanting to keep track of a course and collaborate with other students.
2. How to set up spaces
- Create a new space
- Fill your space with notes
- Share the space with your team
 Create a new space
Create a space by clicking New Space at the bottom of your Spaces list, and give your space a name.
 Fill your space with notes
Start by creating a few notes directly from within a space. Individual notes inside a space can serve as reference guides.
To add a note to your space:
- Click Create a note in the center of the screen or the + New button at the top of the left panel.
- Add a title and some text or images
Use notebooks to organize your notes
Group a collection of related notes together into notebooks to keep your space organized and tidy.
To create a new notebook directly within that space:
- Click Create a notebook in the center of the screen or the New Notebook icon in the upper-right of the screen.
- Give your new notebook a name.
Once you've created a notebook, you can move a note by selecting it and dragging it where you want it. To show and hide the contents of a notebook, simply click on the arrow next to the notebook name.
If you already use Evernote, you can move existing notebooks into a space. Make sure you have editing permissions for both the notebooks you're moving and the space.
To move existing notebooks into a space:
- From any notebook list, right-click the notebook you’d like to move and select Move…, choose a space you want to move it to, then select Move.
Note: Notebooks can only live in one space at a time.
 Share your space with the team
Once you've added a few notes and notebooks to your space, it's time to invite your team so everyone can work together.
Click on the Share button on your space to invite others to all the content within a space.
3. Work more effectively with spaces
Each space conveniently displays:
- What’s New: All recently created and updated notes
- Pinned Notes: Notes that have been pinned for quick access
What's New
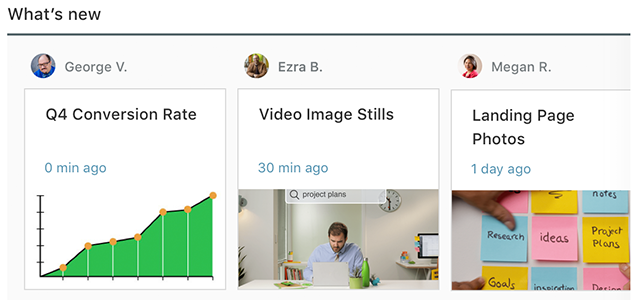
Find out which notes inside a space you have recently added and updated. This view of your notes is automatically refreshed and especially helpful for keeping you updated as projects move forward.
Pinned Notes

Provide quick access to notes you want to call attention to, such as project overviews, process guidelines, or recent reports.
To pin a note:
- Click Edit
- Select the note or notes you want to pin from the list
- Click Done
4. How to delete a space
You can now delete spaces with the latest version of Evernote. Please update your app to access this feature.
To delete a space:
- Open a space
- Click or tap the three dots in the top-right corner
- Select Delete space
Note: Keep in mind any notes or notebooks in the space will be moved to Trash when you delete a space. You can restore them from there, or move any content to another space or notebook before pressing delete.
5. How to share a space
You can now share spaces using the latest version of Evernote. Please update your app to access this feature. Please note: If you invite someone to a space and they haven’t updated Evernote, they won’t be able to use the sharing functionality. Please suggest that they update Evernote.
To share a space (desktop and web):
- Open a space.
- Click Share in the top-right corner.
- Enter the recipient’s email or name, select their permissions (Full access, Can edit, or Can view), then click Send invite.
To share a space (mobile):
- Open a space.
- Tap Share in the top-right corner.
- Tap the share icon.
- Enter the recipient’s email or name, select their permissions (Full access, Can edit, or Can view), then tap Invite.
Important: When you share a space, all notes and notebooks within it are shared with the invited people, based on the permission level you’ve granted. Invited users can leave the space at any time. Only the space owner can delete the space.
Please note that deleting a space will move all associated notes and notebooks to the Trash, and all invited users will lose access to this content.
Even if someone has Can edit or higher permissions on content within a space:
• They can delete individual notes within a shared notebook
• They cannot delete the notebook itself
• They cannot delete individually shared notes, they can only leave them.
Learn more about sharing notes and notebooks.
6. How to hide notes and notebooks from your spaces in your note and notebook lists
By default, notes and notebooks in your Spaces also appear in the general note and notebook lists of your Evernote account. To keep these notes and notebooks separate from the rest of your content, click the filter icon at the top of your note or notebook list and toggle off “Show notes in Spaces”.
FAQ
- I can't see Spaces in my sidebar on my desktop app/Evernote Web.
- Spaces are likely hidden because the sidebar has been customized. To see them, click on your profile icon > Settings > Preferences > Sidebar.
Updated