Research saves you time with the Evernote web clipper
Researching for a particular topic is often timely and hard to organize with traditional means. At Evernote, we developed the web clipper to help you easily clip articles and organize them efficiently with a few clicks.
In this article, you'll also see an effective way to structure clipped articles into a practical list of sources that you can easily revisit and keep track of.
Additionally, you'll see how to easily create a summary of the sources researched.
Step 1
Structuring content
CREATE A NOTEBOOK FOR THE RESEARCH TOPIC
Let's say we're researching a topic about managing remote teams. Create a notebook titled "Research remote teams management" within a stack or space called "Remote teams management".
From within a space

Not from within a space

Step 2
Clipping content
CLIPPING ARTICLES
- Navigate to the article that needs to be clipped from your desired website.
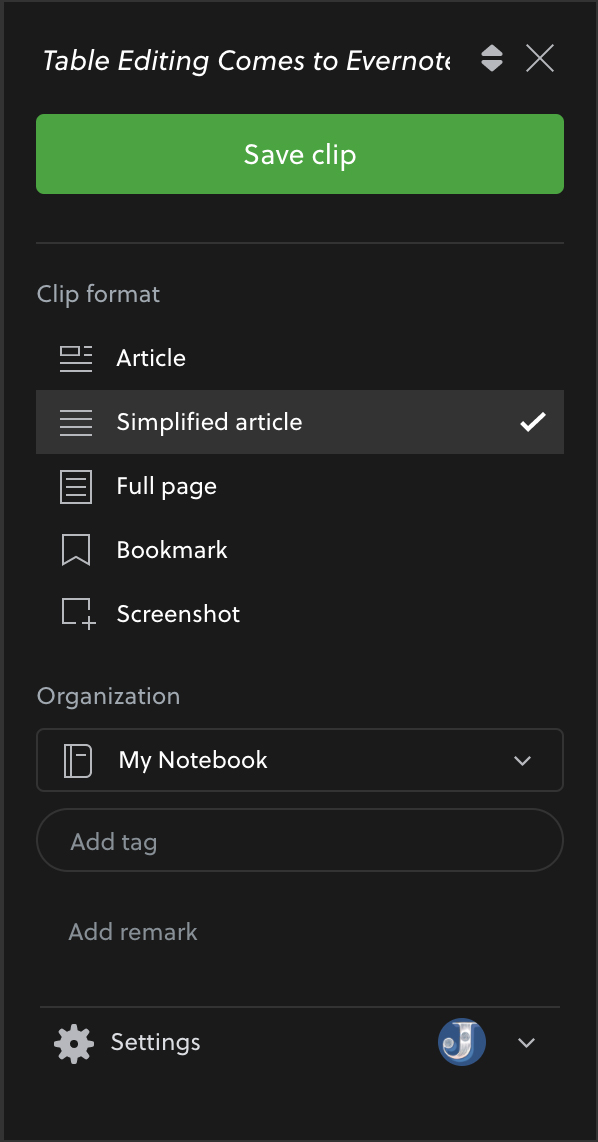
- Open the Evernote web clipper from your browser toolbar (download here).
- Under "Clip format" select your preferred clipping mode, I prefer "Simplified article mode".
- Under "Organization" click the arrow within the box underneath to choose the destination notebook or space, I usually put this in the notebook "Research articles."
- Add a tag if you organize also with tags.
- Add a remark, which will show as a comment at the bottom of the clipped article.
- Save the clip by clicking the green button.
- Repeat for all other articles.
Step 3
Structuring content (Part 2)
- Now that we have all sources finished, we can create a "Summary of Sources" via internal note links with the articles we clipped.
- Open the notebook "Research remote teams management".
- Scroll to the bottom of the notes' list.
- While holding the "Shift" button pressed, click on the last note at the bottom of the list.
- Right-click or two-finger click on one of the selected notes > "Copy internal links" > "Copy app links".
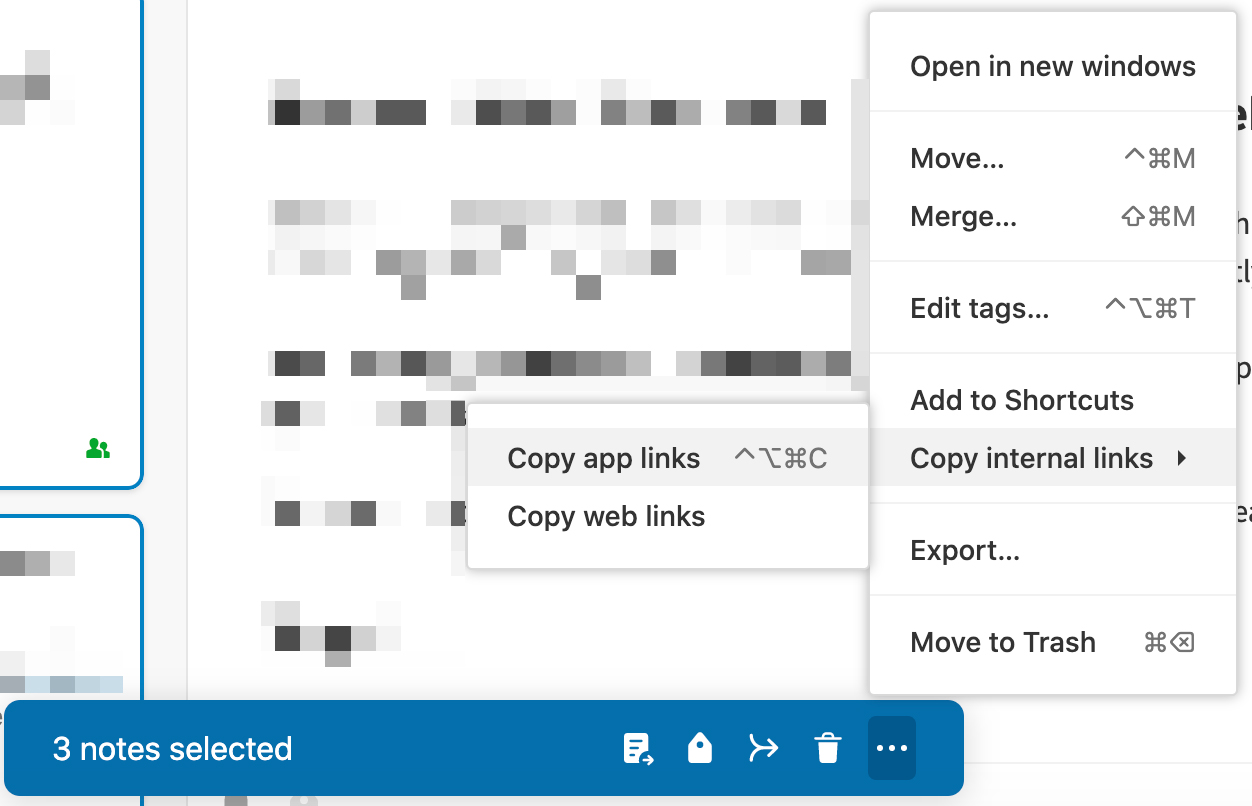
- Click on the green "+ New Note" at the top left of Evernote and name this note "Summary of Sources".
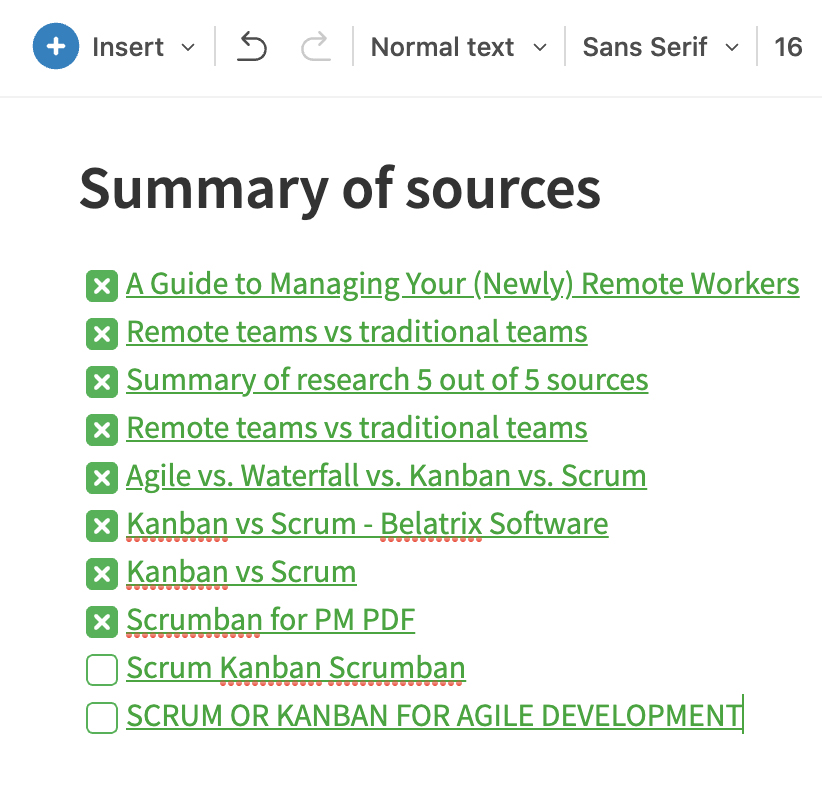
- Paste within "Summary of Sources" by using "cmd + v" or "ctrl + v". This will populate the titles of the notes as internal hyperlinks, that can open the notes.
- Select all text that has now appeared and click on " + Insert" at the top left of the note.
- Select "Checkbox". This will give us the opportunity to tick the sources we have already skimmed through.
Step 4
Writing a research summary
- Create a new note within the notebook and call it "Research summary".
- Go ahead and click on the "+ insert" button at the top left of the note editor and select "Table".
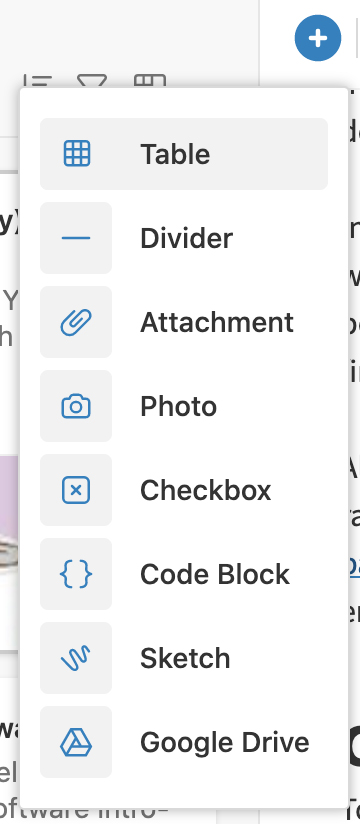
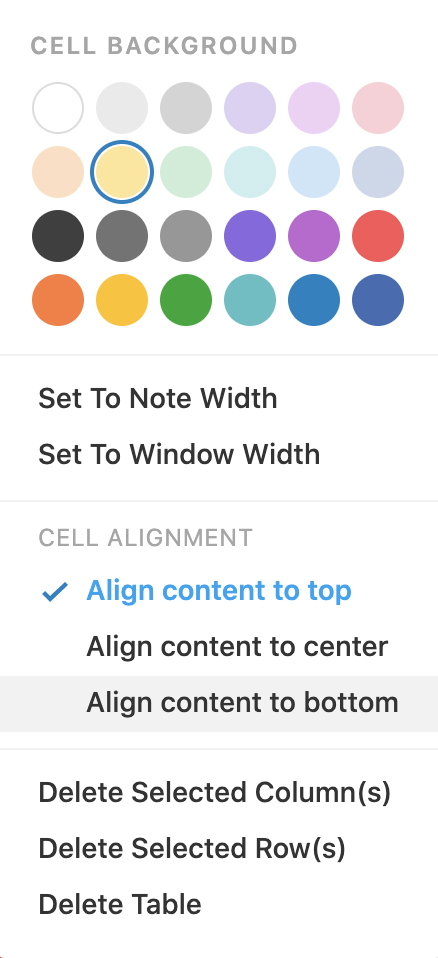
- Once you have your table, you can customize it, by selecting the cell, row or column and clicking the downwards-facing arrow at the top right of the selection.
- Right-click or two-finger click on the template > "Open in new window". From Mac: Hover your mouse over the green "maximize" button of the "Research summary template" and select "Tile window to right of screen". Select the Evernote window from the left side of the screen.
- From the left Evernote window, open the "Summary of Sources" note and go ahead and click on the first note at the top.
- Optional: At the top left of the note editor you can click the "expand note" button to work in full-screen

- Place your cursor at the top of the note body and go to "+ insert" > "Checkbox"
- Type next to this checkbox "skimmed through".
- Once you're done with this source, tick the "skimmed through" checkbox.

- Collapse the note at the top right of the note, if expanded from step 6.
- Click the back arrow at the top left of Evernote to go back to the "Sources" note
- Tick the checkbox of the source you just worked on and open the second note in line and repeat this process from step 6.
Step 5
Share your content with your team
EVERNOTE BUSINESS
Invite the rest of your team to the Space you have just created by granting them the permissions you consider necessary.
EVERNOTE PREMIUM & BASIC
Share all the notebooks you created with the rest of your team giving them the permissions you consider necessary.
YOU ARE READY!
For additional questions, please contact your Customer Success Manager. If you don’t have a Customer Success Manager, you can always email your questions to CustomerSuccess@evernote.com.
Updated