In this guide:
Overview
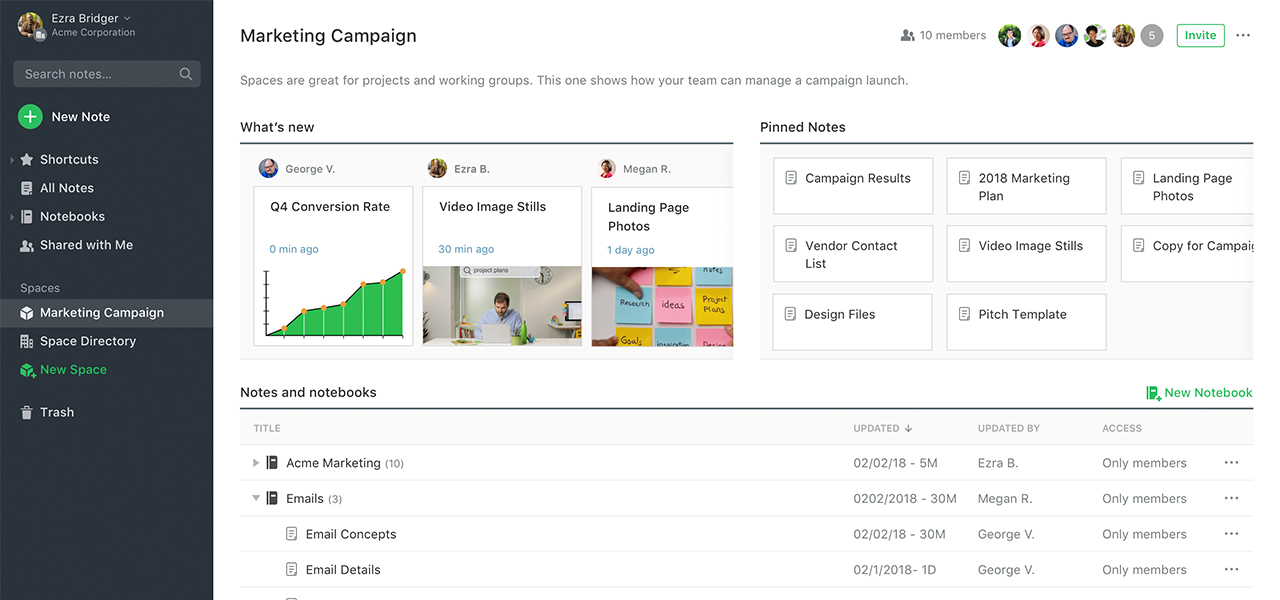
Spaces, in Evernote Teams, is the simplest way to organize team knowledge into a centralized, easily accessible, single source of truth. Allowing you and your team to achieve more together.
By creating a new space for each project, topic, or workgroup, your team can:
- Quickly view, share, and edit a collection of related notes and notebooks in one place
- Easily see what others on your team are working on—what's been added or updated by someone else
- Highlight important notes by pinning them for quick reference and easy access
Once you've created a space, invite others to join it so they can automatically access and see updates to any notes and notebooks in that space.
Ways to use spaces
How you and your team decide to organize your spaces really depends on how your team works and what it wants to achieve.
EXAMPLES:
-
Managing clients and vendors
GOAL: Keep track of customer and partner accounts and make it easy for everyone on the team to quickly capture, save, and find what they need.
HIGHLIGHTS:
- One space for each group of clients or vendors, categorized by geography, owner, or type.
- Separate notebooks for each client or vendor account with relevant meeting notes, ideas clipped from the web, or PDF proposals.
- Use What's New to track recent client and vendor activity or meetings
- Use Pinned Notes for quick access to key client or vendor accounts, or those which require immediate attention.
-
Managing projects
GOAL: Keep track of project info, tasks, and timelines; and make it easy for everyone on the team to quickly capture, save, and find what they need.
HIGHLIGHTS:
- One space for each project
- Separate notebooks for different types of info, such as meeting notes, ideas, design specs, or marketing materials
- View What's New to track recently updated project timelines or task lists.
- Use Pinned Notes for quick access to a project overview, milestone, or messaging notes
-
Process management
GOAL: Manage and track people and deliverables as they move forward through each stage of a process.
- A hiring manager or recruiter could move a candidate's resume from one notebook to another as a candidate moves through the recruiting process
- What's New tracks the most recent candidate activity, and the Pinned Notes could provide your team with quick access to recruiting and HR guidelines
HIGHLIGHTS:
- One space for each process, such as recruiting, blog publication, or creative design processes
- Separate notebooks for each step/phase/stage of a process, with separate notes for each person or deliverable you want to track
- View What's New to see recently updated candidates, copy docs, or project briefs
- Use Pinned Notes for quick access to interview questions, brand and style guidelines, or approver lists
How to set up spaces
Before you get started, open Evernote and explore some of the example spaces in the team Directory. Meet with your team to determine which type of spaces make the most sense your team, then follow these three steps:
- Create a new space
- Fill your space with notes
- Share your space with the team
Once you share it with your team, everyone on your team can see everything in that space. You get to decide what level of permission each person gets.
 Create a new space
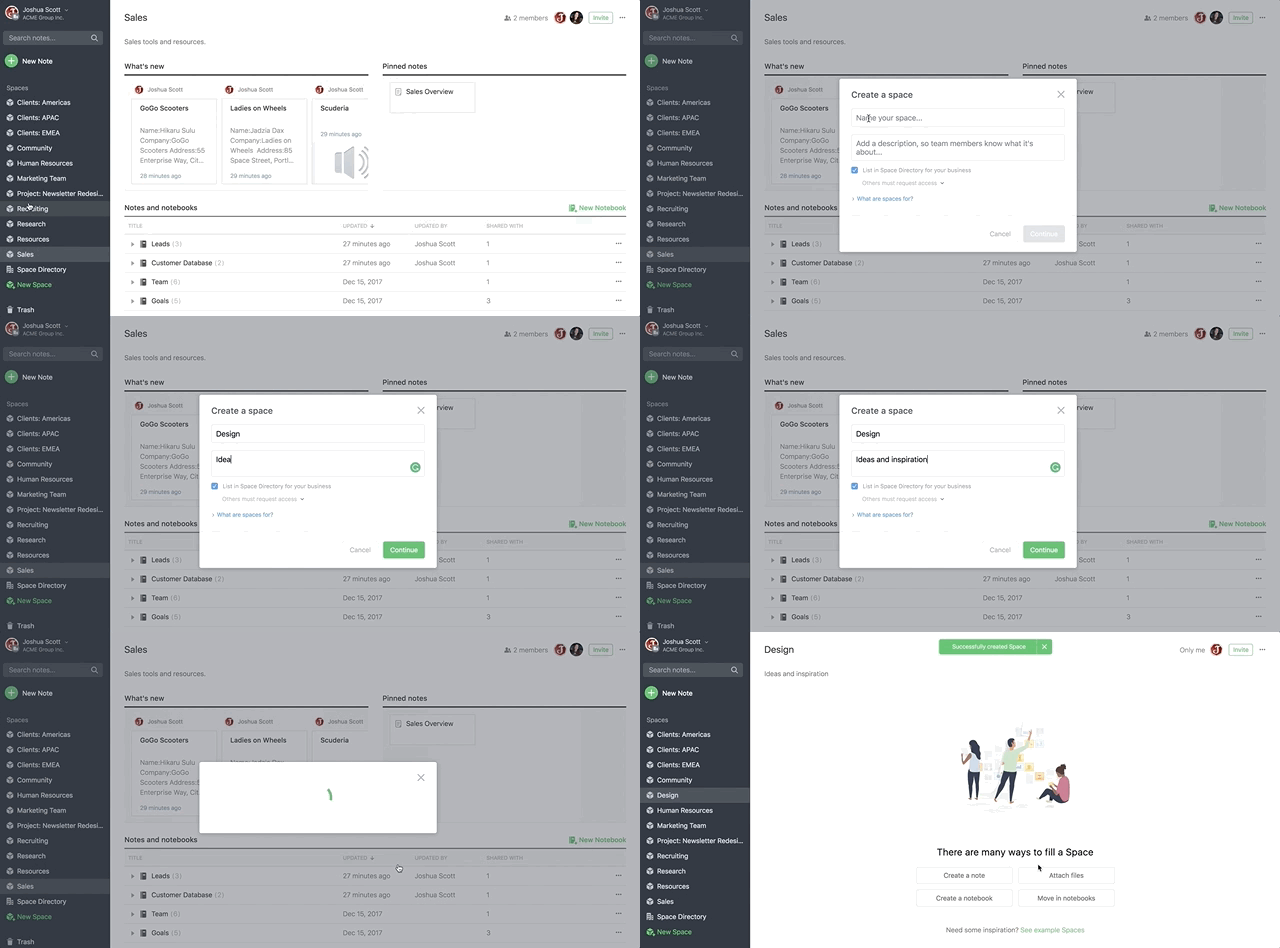
Create a space by clicking New Space at the bottom of your Spaces list, and give your space a name. You can also add a description.
 Fill your space with notes
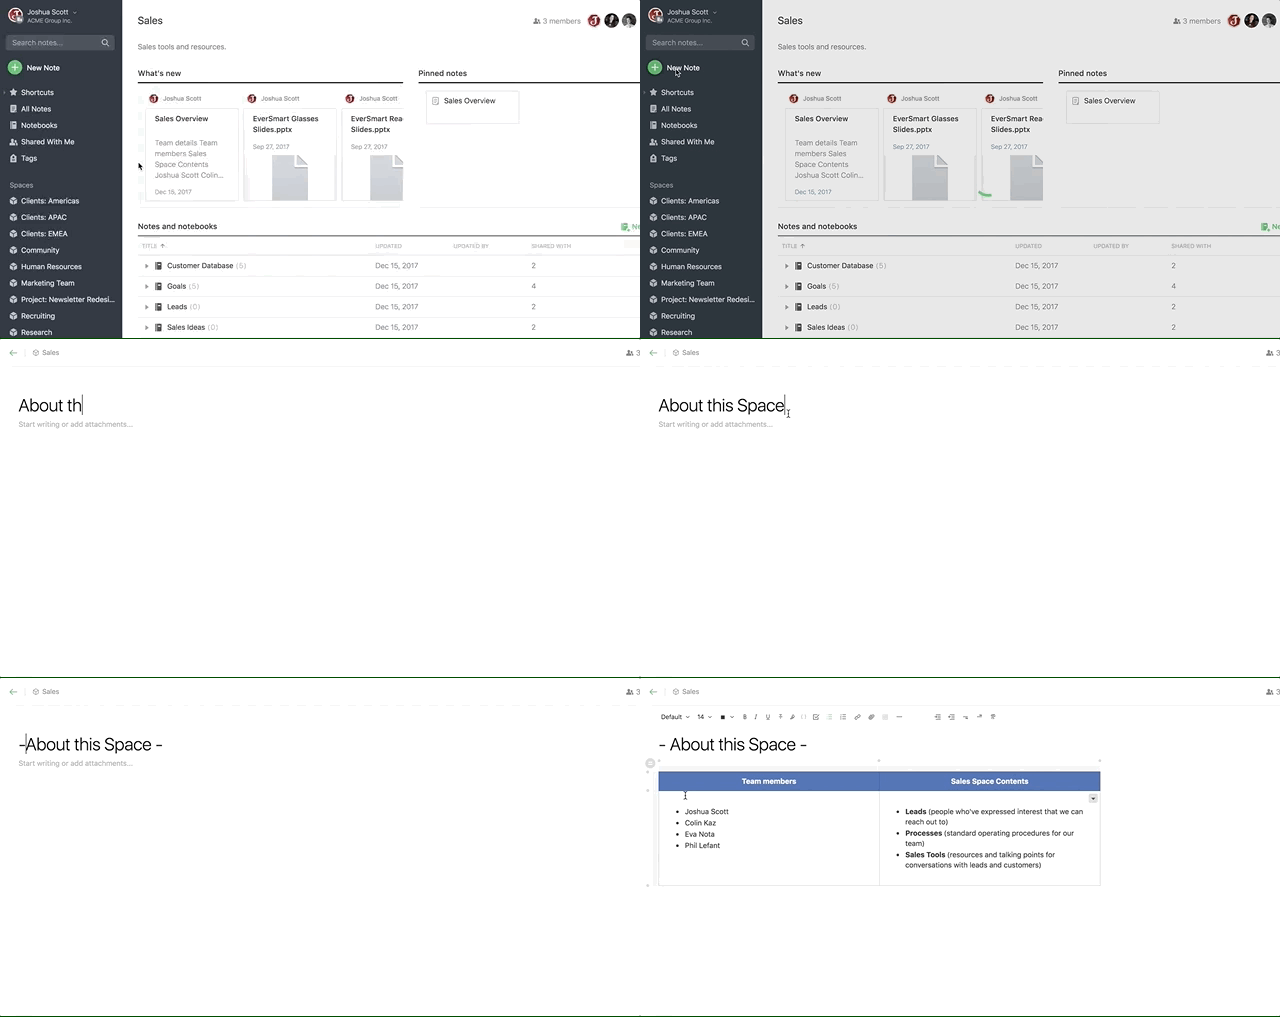
Start by creating a few notes directly from within a space. Individual notes inside a space can serve as reference guides. An 'About this space' note or a 'Team Onboarding' note, for example, are great ways to orient new team members to the space and to your team.
To add a note to your space:
- Click Create a note in the center of the screen or the + New button at the top of the left panel.
- Add a title and some text or images
Use notebooks to organize your notes
Group a collection of related notes together into notebooks to keep your space organized and tidy.
To create a new notebook directly within that space:
- Click Create a notebook in the center of the screen or the New Notebook icon in the upper-right of the screen.
- Give your new notebook a name.
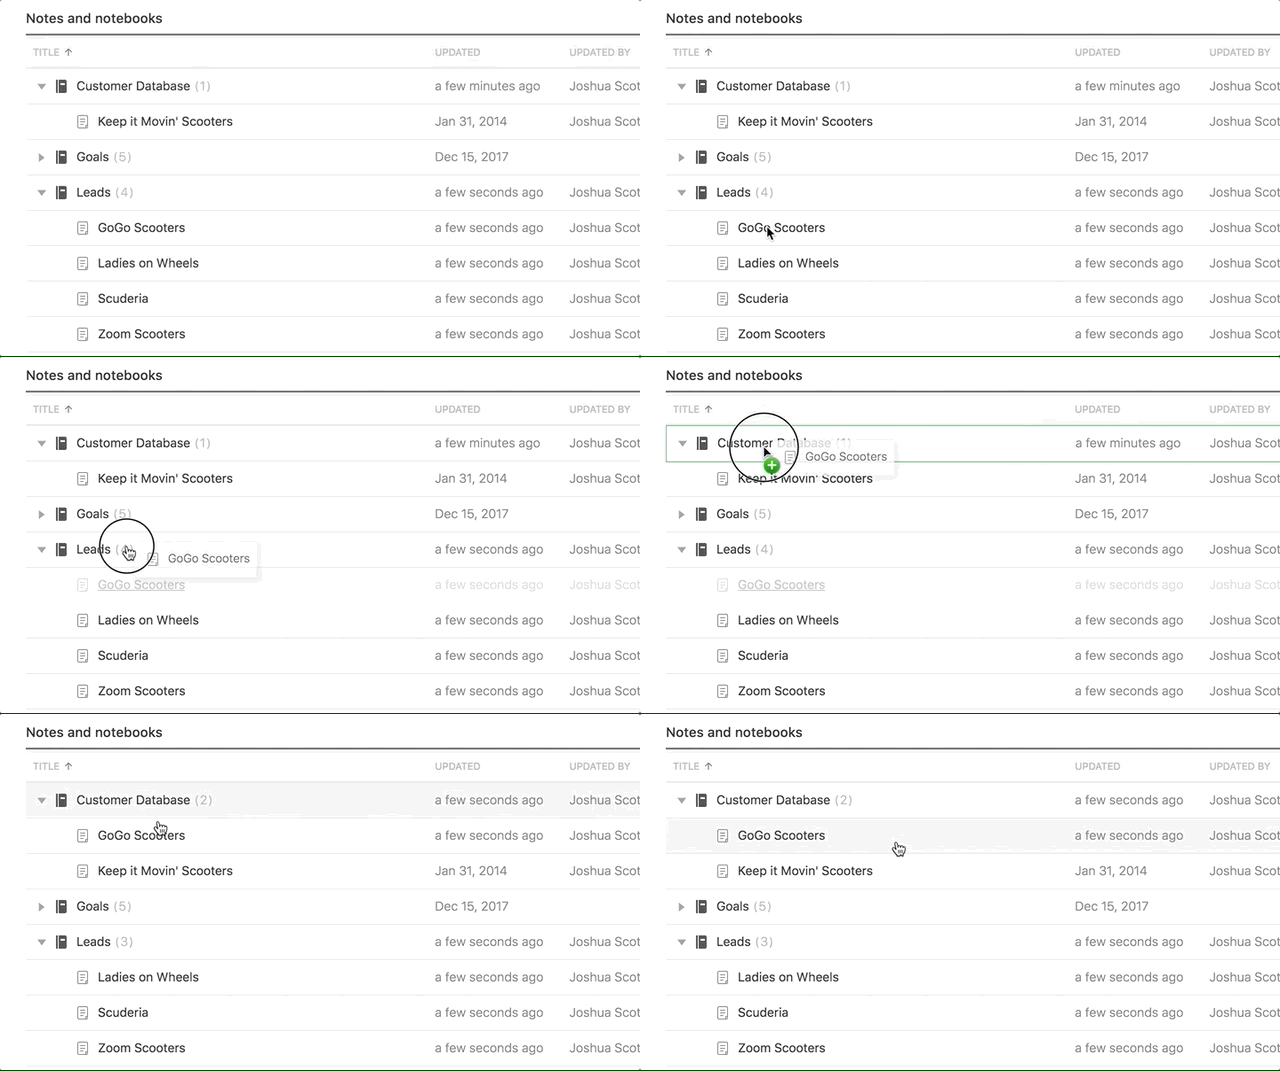
Once you've created a notebook, you can move a note by selecting it and dragging it where you want it. To show and hide the contents of a notebook, simply click on the arrow next to the notebook name.
Already using Evernote Teams?
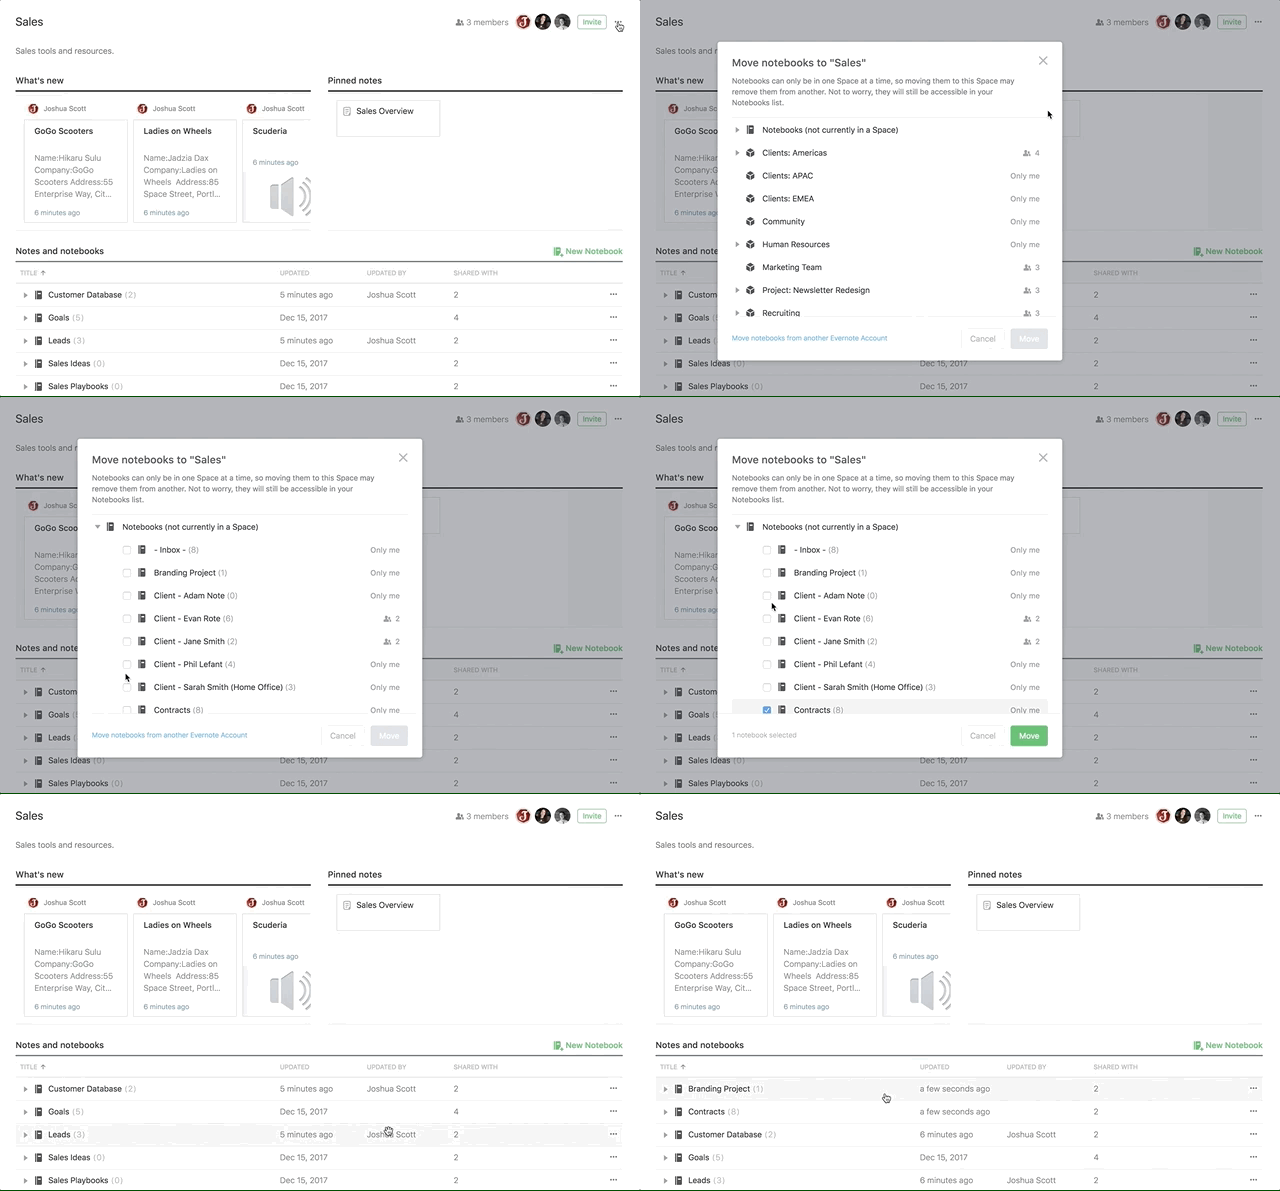
If you already use Evernote, you can move existing notebooks into a space. Make sure you have editing permissions for both the notebooks you're moving and the space you're moving them into.
To move existing notebooks into a space:
- From within any space, click the three dots in the upper right corner, select Import content, choose the notebooks you want to move into that space, then select Move.
- From any notebook list, right-click the notebook you’d like to move and select Move…, choose a space you want to move it to, then select Move.
Note: Notebooks can only live in one space at a time.
 Share your space with the team
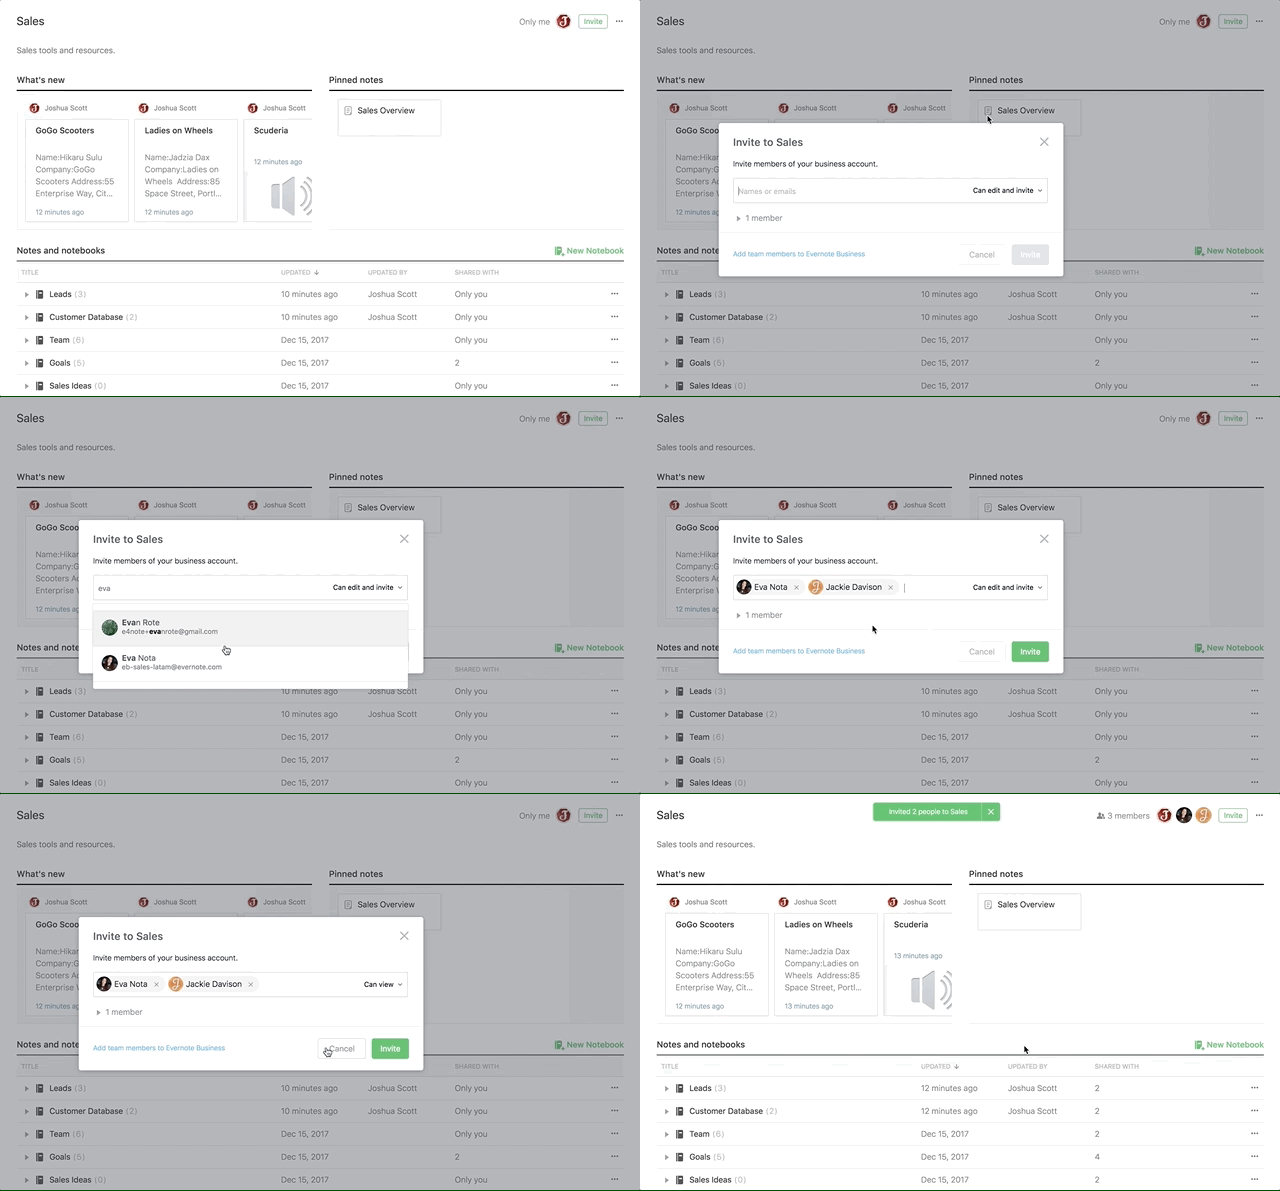
Once you've added a few notes and notebooks to your space, it's time to invite your team so everyone can work together.
- Click the Share button to invite anyone who is a part of your company's Evernote Teams account.
- Decide whether team members will be able to view, edit, or invite others on a person-by-person basis. (Once you've invited team members to join, they'll have the same level of permission for any notes and notebooks inside that space.)
- See whom you've shared a space with by looking at the upper-right of the screen.
Share your space with everyone in the Teams account
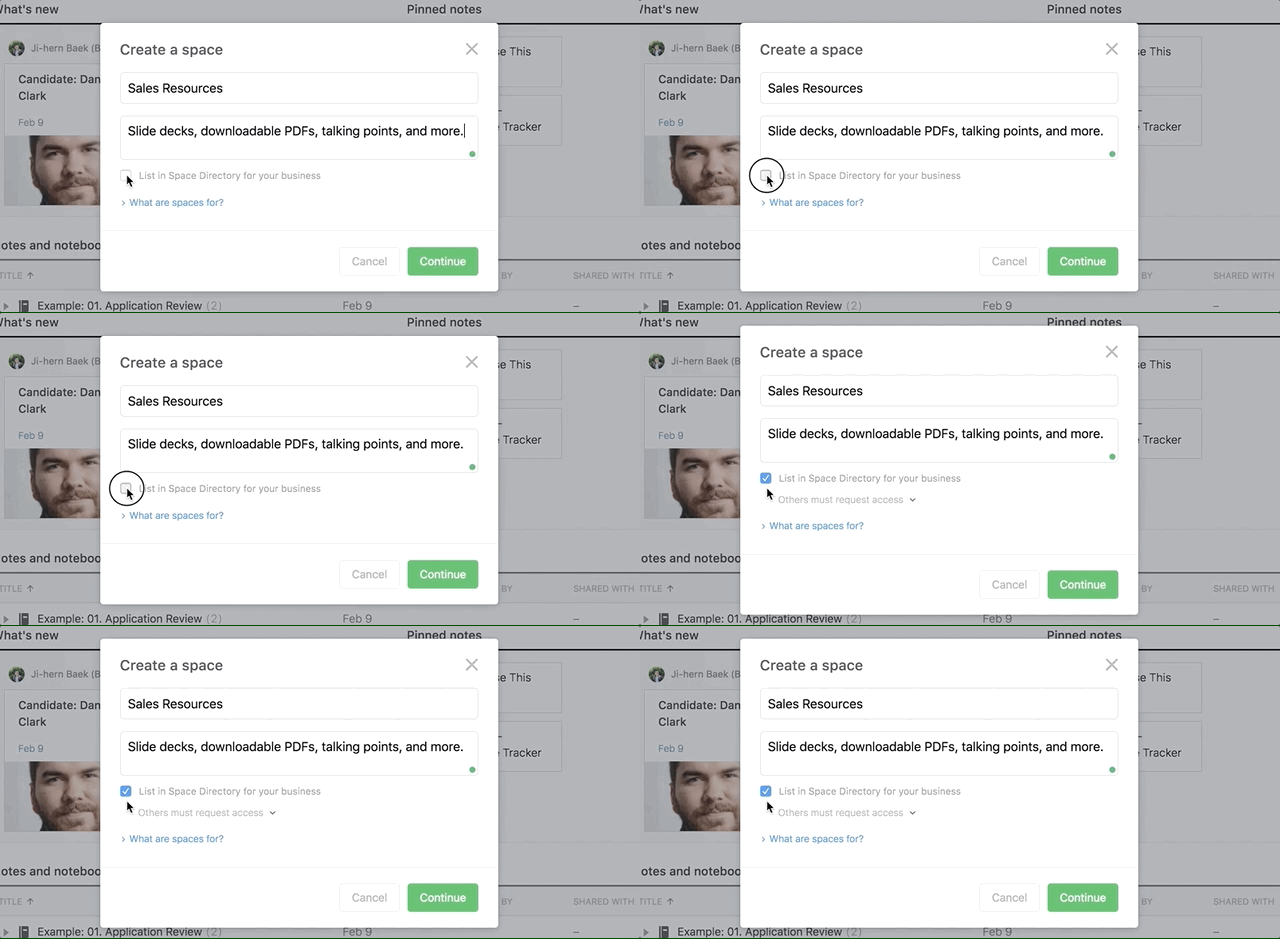
To allow anyone in the Evernote Teams account to see or join your space, toggle on the setting for Publish to Directory in the ‘Create new space’ or ‘Share space’ window. To access the Directory, click Directory at the bottom of your Spaces list.
Work more effectively as a team
Spaces are designed to help you and your team stay updated without having to send additional emails to each other.
Each space conveniently displays:
- What’s New: All recently created and updated notes
- Pinned Notes: Notes that have been pinned for quick access
What's New
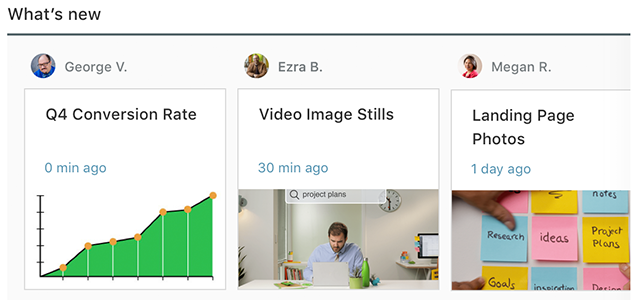
Find out which notes inside a space you and others on your team have recently added and updated. This view of your notes is automatically refreshed and especially helpful for keeping team members updated as projects move forward.
Pinned Notes

Provide quick access to notes you want to call attention to, such as project overviews, process guidelines, or recent reports.
To pin a note:
- Click Edit
- Select the note or notes you want to pin from the list
- Click Done
Updated